Legends Launcher
Setup Guide
Everything from the download to your first game, in order. Each step uses the same names you'll see on screen.
Download for WindowsBefore you start
- Windows 10 or 11 (64-bit)
- A Microsoft account that owns Minecraft: Java Edition
- An internet connection for the first launch
Download the installer
Select Download for Windows on this page or on the Legends Launcher page. The file is called
Legends-Launcher-Setup.exe, and the link always points to the newest release.If your browser asks whether to keep the file, choose to keep it.
Run the installer
Open the file from your Downloads folder.
If Windows shows Windows protected your PC, select More info, then Run anyway. The prompt appears because the installer isn't code-signed yet.
There are no setup screens to click through. Legends installs for your Windows account only, so no administrator rights are needed, adds Desktop and Start menu shortcuts, and opens as soon as it's done.
Sign in with Microsoft
Select Sign in in the top-right corner. Until you sign in, the Play button offers the same thing.
A Microsoft window opens. Sign in with the account that owns Minecraft: Java Edition and follow its prompts. You type your password on Microsoft's own page, so Legends never sees it.
Once you're in, the status line reads Signed in as [your name]. You're ready to play. and your skin appears on the Play screen. Your sign-in is saved and encrypted by Windows, so next time you go straight to Play.
Playing on more than one account? Open Settings and select Add another account under Account. You can save up to 10 and switch between them there.
Pick a version and server
This step is optional: the defaults work. Open Settings. Changes save as you make them and apply on your next launch.
- Minecraft version. Type a version or pick one from the list. The hint underneath shows the latest release. Fabric and performance mods apply to 1.14 and newer; older versions run vanilla.
- Mod profile. Competitive installs performance mods only: Sodium, Lithium, FerriteCore, Entity Culling and ImmediatelyFast. Full adds Mod Menu, Zoomify, Sodium Extra and Reese's Sodium Options.
- Server. Enter the address of the server you want to join, and the port if it isn't 25565. The game joins it automatically after loading. The address comes filled in, so replace it with yours, or clear it to start at the main menu.
- Memory. The slider shows how much RAM your PC has and a recommended amount for Minecraft.
- Game. Window size, fullscreen, and whether the launcher stays open or minimizes while you play.
- Privacy. Turn the anonymous usage stats on or off. The privacy policy lists exactly what they contain.
Press Play
Select Play. The first launch sets everything up, and the progress bar shows each of its five steps:
- Checking Java, which downloads the right version if your PC doesn't have it
- Installing Fabric
- Installing mods
- Checking game files, which downloads the game the first time
- Starting Minecraft
The first launch takes the longest because it downloads the game. After that, Legends only re-checks files that changed, so later launches are quick.
While Minecraft runs, the Play button turns into Stop. When the game closes, the launcher is ready for the next session.
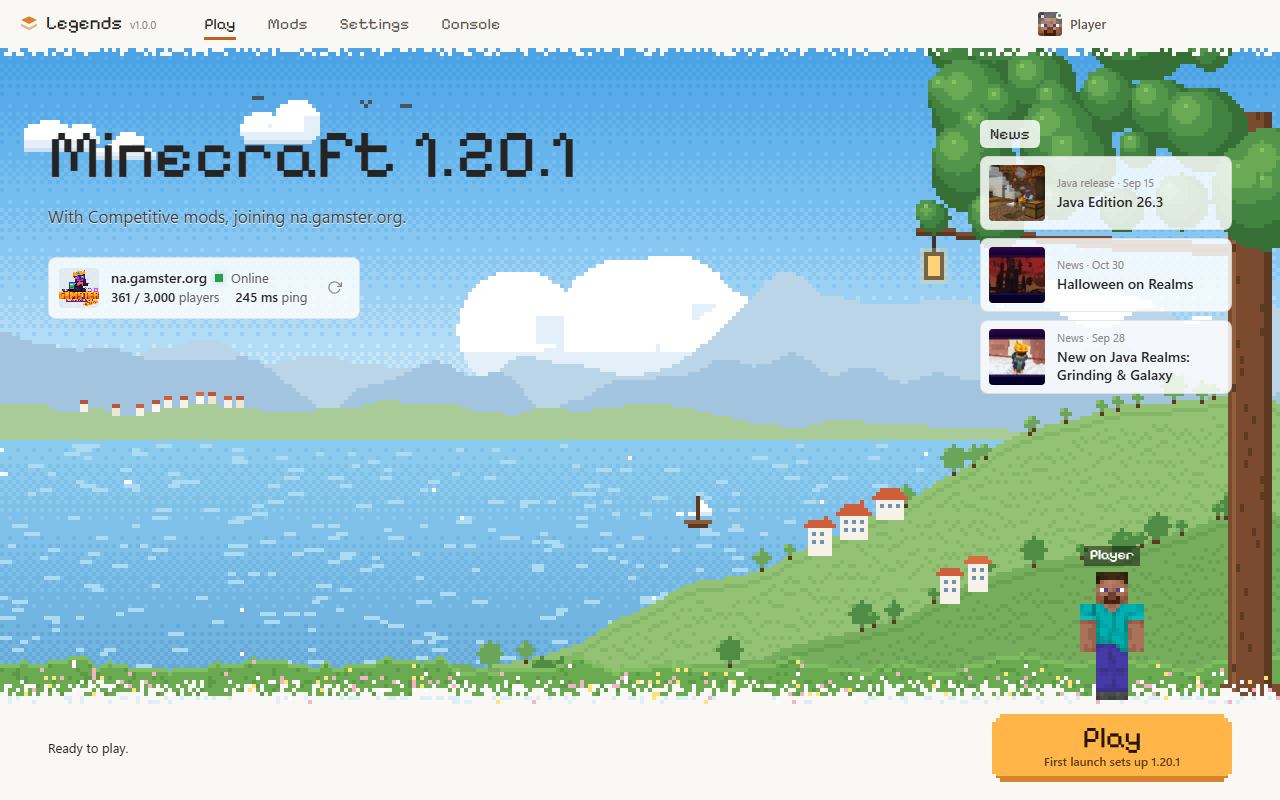
The Play screen, signed in and ready. Add mods, packs and shaders
Open the Mods tab and choose Mods, Resource packs or Shaders. Search Modrinth on the right and select Add.
- Mods bring their required dependencies with them.
- Resource packs switch on by themselves.
- Adding a shader installs Iris for it.
- Everything installs on your next launch, for the instance you're on.
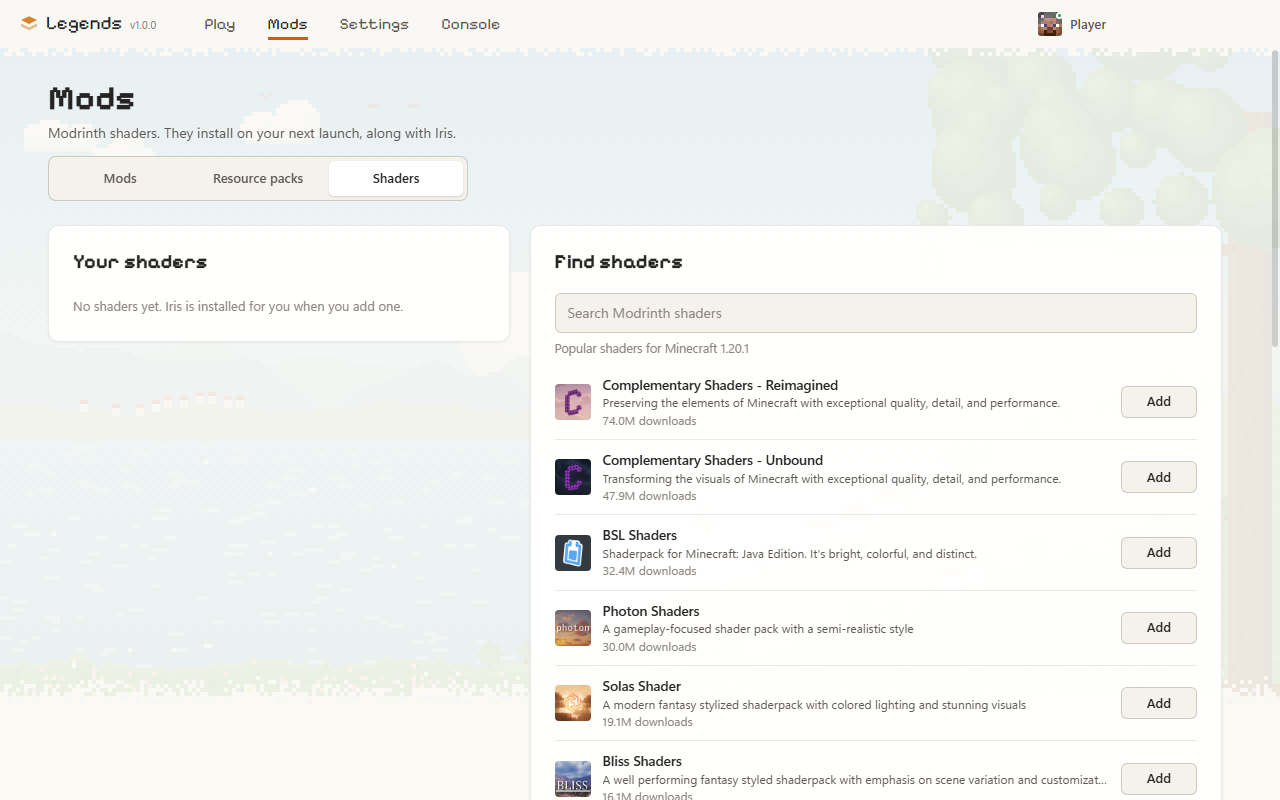
The Mods tab, searching Modrinth for shaders. Keep separate setups
An instance is a separate setup with its own version, mods, worlds and options. Open Settings, select New under Instance, give it a name such as Survival 1.21, and select Create.
Switch instances from the menu next to the Play button. Game files are shared between instances, so a new one is ready in seconds. Open folder shows the selected instance's files, such as its worlds.
Stay up to date
Legends updates itself. New versions download in the background, and when one is ready a banner reads A new version is ready. Select Restart to update to install it.
If something goes wrong
“This Microsoft account does not own Minecraft.”
The account you signed in with doesn't have Minecraft: Java Edition. Sign in with the account that bought it.
“Session expired. Sign in again to play.”
Your saved sign-in has run out. Select Sign in and sign in again.
Minecraft crashed
The launcher comes back on its own. Select Open crash report next to the status line to see what happened.
“Launch failed. Open the console for details.”
Open the Console tab to see what went wrong. To ask for help, open Support, select Copy diagnostic info and paste it into your bug report.
Windows blocked the installer
Select More info, then Run anyway, as in step 2.
Modrinth or Fabric is down
The game still starts, using the mods you already have.
Still stuck?
Open Support in the launcher and select Report a bug or Email support, or report it on GitHub.
Uninstall
Open Windows Settings, go to Apps, find Legends Launcher and select Uninstall. It asks whether to also delete your game data: worlds, mods, the Java runtime, downloaded game files and your saved sign-in. Choose No to keep them for a future reinstall.
Updates never touch your game data.